

How to Remodel Stairs from Carpet to Wood Without Hiring a Pro
When you think about how to remodel stairs from carpet to wood, it may seem like a daunting task. But with the right tools and a little patience, it’s entirely possible to transform your stairs into beautiful, timeless hardwood without hiring a professional. You can either remove the existing treads and replace them with new hardwood treads or install hardwood treads on top of the existing ones. Here’s a quick overview so you can get started right away:
- Remove the Carpet: Carefully pull up the carpet and remove any staples or nails.
- Prepare the Stairs: Sand down any rough areas and fill in holes with wood filler.
- Measure and Cut New Treads and Risers: Use precise measurements to cut the wood to fit. You will need hardwood planks for this step.
- Install New Treads and Risers: Apply adhesive and secure with a brad nailer.
- Finishing Touches: Sand, stain, and seal your new steps for a polished look.
Remodeling your stairs from carpet to wood offers several benefits, including:
- Enhancing Aesthetics: Wood adds a warm, elegant touch to any home.
- Increasing Home Value: Hardwood stairs can boost your home’s resale value.
- Improving Durability: Wood is easier to clean and maintain than carpet.
I’m Kristin Hintlian, co-owner of Bonsai Builders with experience in construction. Remodeling stairs from carpet to wood is an area of expertise for me, and I’ve guided many homeowners through this transformation. Now, let’s dive into the details and get started on your stair remodeling project.
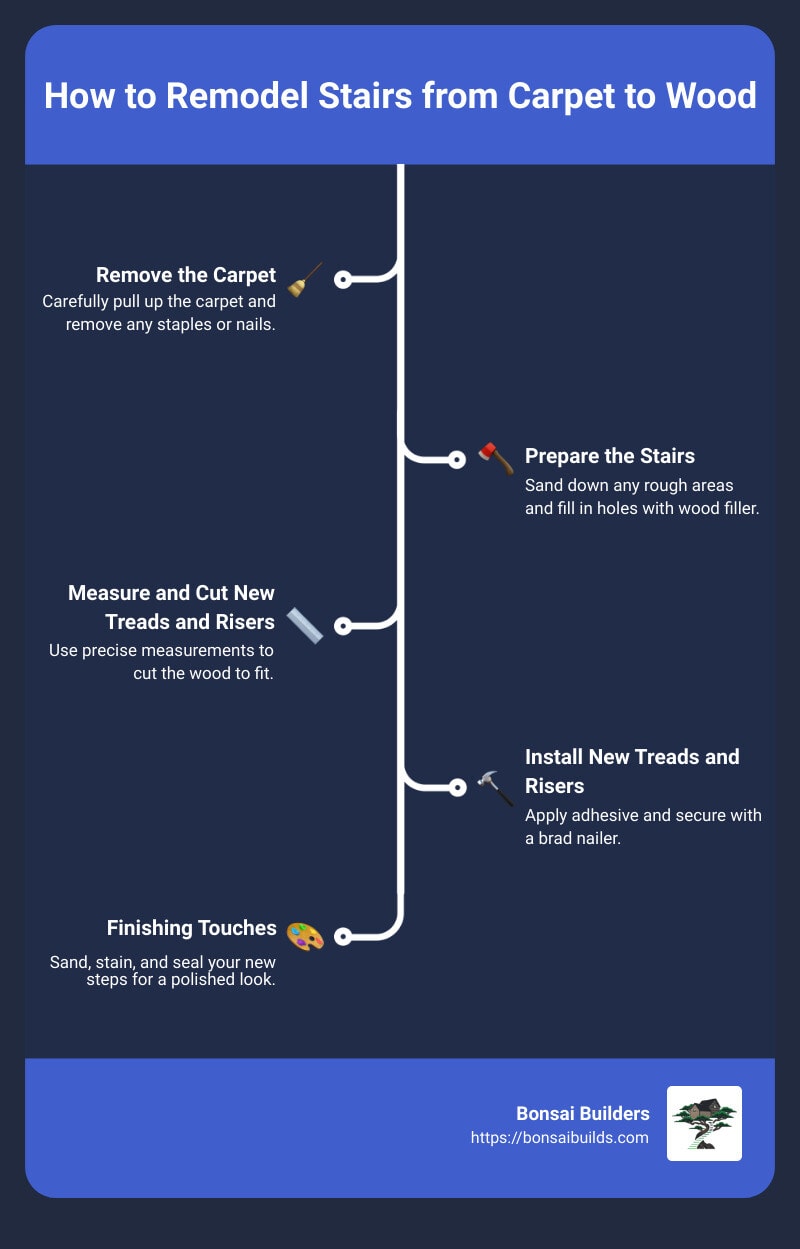
Table of Contents
Tools and Materials Needed
Before you start remodeling your stairs from carpet to wood, gather all the necessary tools and materials. Here’s a comprehensive list to ensure you have everything you need:
Safety Gear
Safety should always come first. Make sure you have:
- Dust Mask or HEPA N95 Respirator: Essential when sanding or using any chemicals.
- Safety Glasses: Protect your eyes from dust and debris.
- Gloves: Use them to protect your hands from splinters and chemicals.
- Ear Protection: If you’re using power tools, ear protection is a must to prevent hearing damage.
Power Tools
Power tools make the job faster and easier. Here are the essentials:
- Orbital Sander: For sanding the wood to a smooth finish.
- Circular Saw: Ideal for cutting the bullnoses off the stairs.
- Jig Saw: Useful for notching and cutting intricate parts of the treads.
- Table Saw and Mitre Saw: These are great for cutting treads and risers to size.
- Brad Nailer: Helps secure the treads and risers in place.
Adhesives
Using the right adhesive ensures the durability of your stairs:
- Loctite PL Premium: This is a strong adhesive perfect for securing treads and risers. Apply liberal amounts to the backside of each piece before installation.
Wood Products
Choosing the right wood products is crucial for a seamless look:
- Treads and Risers: Home Depot offers a variety of options, including hardwood treads and stair risers. Make sure to pick ones that match your desired aesthetic.
- Stainable Wood Filler: Use this to fill any holes or imperfections before sanding.
Cleaning Tools
Keeping the workspace clean is essential for a smooth finish:
- Shop-Vac: A powerful vacuum to clean up dust and debris.
- Microfiber Cloth: Perfect for wiping down the stairs after sanding and before staining.
Other Essentials
Don’t forget these important items:
- DAP Alex Flexible Caulk: Use this to fill any gaps between the treads and risers.
- Painter’s Tape and Plastic Sheeting: Cover sensitive areas to protect them from dust and stains.
- Mineral Spirits: For cleaning the stairs after sanding and before staining.
With these tools and materials, you are well-prepared to start your project. Preparation is key to a successful stair remodel. Next, we’ll dive into the step-by-step guide to remove the carpet and prepare your stairs for their new wooden look.
Step-by-Step Guide to Remodeling Stairs from Carpet to Wood

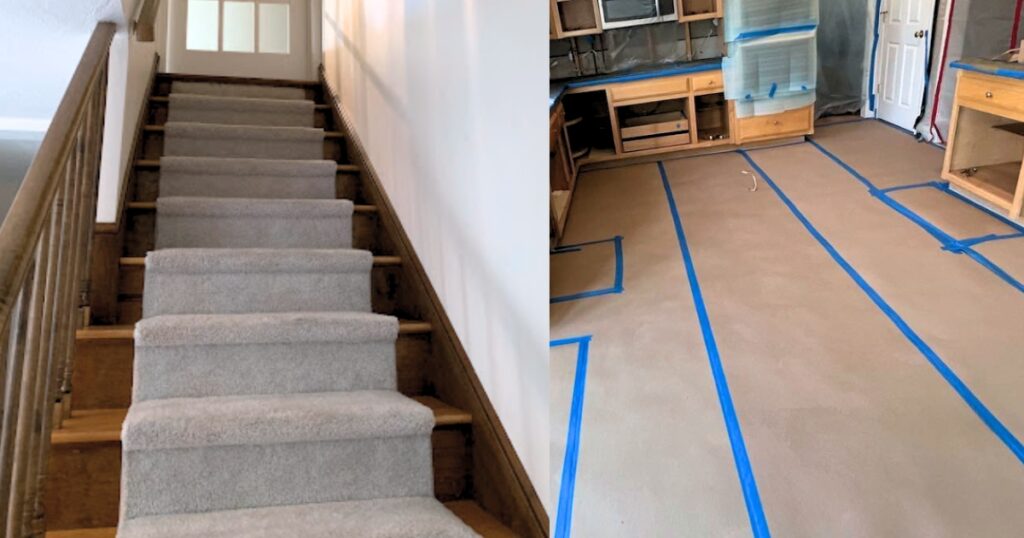
Step 1: Remove the Carpet
First, you need to get rid of the old carpet. Start by pulling up a corner of the carpet using long-nose pliers or a flathead screwdriver. Once you have a good grip, pull the carpet away from the tack strips. Use a utility knife to cut the carpet into manageable sections.
Next, remove the carpet pad. It’s usually held down by staples, which you’ll need to pull out using a staple remover or flathead screwdriver.
Then, remove the tack strips. Use a hammer and crowbar to pry them up. Be careful not to damage the wood underneath.
Finally, vacuum the stairs to get rid of any leftover debris and dust.
Step 2: Prepare the Stairs
Now, you need to prepare the stairs for the new treads. This involves cutting off the nosing (the part of the tread that sticks out). Use a circular saw for this, and make sure to cut along a straight line.
Stair stringers play a crucial role in supporting the new treads and risers, so ensure they are in good condition before proceeding.
After cutting the nosing, use a jig saw, hammer, and chisel to square off the treads. Make sure the surface is flat and even. This will help the new treads fit perfectly.
Step 3: Measure and Cut New Stair Treads and Risers
Measure each stair carefully, noting the width and depth of each hardwood stair tread and the height of each riser. Stairs can vary, so measure each one individually.
Using your measurements, cut the riser pieces and hardwood stair tread caps. A table saw, mitre saw, and circular saw will make this easier. Ensure your cuts are precise for a snug fit.
Step 4: Install New Treads and Risers
Apply construction adhesive to the back of each riser and press it into place. Use a brad nailer to secure it.
Next, apply adhesive to the back of the stair tread caps and fit them onto the treads. Dry fit them first to ensure a proper fit. Use a mallet to tap them into place gently. Secure them with a brad nailer. Fill any nail holes with wood putty and wait for it to dry before sanding it smooth.
Fill any gaps with wood putty and caulk the edges where the risers meet the treads.
Step 5: Finishing Touches
Sand the stair treads and risers to smooth out any rough edges. Use #60, #80, and #120 grit sandpaper for a smooth finish. Clean the dust with a vacuum and mineral spirits.
Apply wood stain to the treads following the grain of the wood. Use a paintbrush or cloth. Allow the stain to dry according to the manufacturer’s instructions.
Next, apply polyurethane for a durable finish. Use a foam brush and apply three coats, letting each coat dry as directed.
Finally, paint the risers with a primer and then your chosen paint color. Use painter’s tape to protect the stained treads and walls. Apply multiple coats for a smooth finish.
Section off the area to keep dust from spreading. Let everything dry completely before walking on your new stairs.
With these steps, you’ll have beautiful hardwood stairs that transform your home. Ready for the next phase? Let’s dive into the cost considerations.
Cost Considerations
Cost Per Step
When remodeling stairs from carpet to wood, the cost per step can vary. On average, you can expect to pay between $100 and $250 per stair. This includes the cost of materials like wood treads and risers, as well as any additional supplies like adhesives and finishes. If you have 10 steps, this means your total cost could range from $1,000 to $2,500.
Type of Wood
The type of wood you choose significantly impacts the cost. Here are some common options:
- Pine: Affordable and widely available, but softer and more prone to dents.
- Oak: Durable and popular, costing around $100 to $150 per step.
- Maple: Harder than oak and slightly more expensive.
- Exotic Hardwoods (Teak, Mahogany): Very durable but can cost $200 or more per step.
Style of Staircase
The style of your staircase also affects the cost. A standard straight staircase is usually cheaper to remodel than a spiral or curved staircase. Custom designs and intricate railings can add to the overall expense.
DIY vs Professional
DIY: Doing it yourself can save you a lot of money. You’ll only need to pay for materials, which can range from $1,000 to $3,000 depending on your choices. However, keep in mind the time and effort involved.
Professional: Hiring a professional can be more expensive but ensures a high-quality finish. General contractors typically charge $50 to $100 per hour, and a full staircase remodel can take between 8 and 12 hours, adding another $400 to $1,200 in labor costs.
Additional Costs
Don’t forget about finishing touches like railings and balusters. These can add anywhere from $300 to $2,000 to your project, depending on the materials and complexity.
Permits and Inspections
In some areas, you may need a permit or inspection, which can cost between $200 and $500 for permits and $100 to $300 per visit for inspections.
Remodeling your stairs from carpet to wood can be a significant investment, but the transformation is often worth it.
Conclusion
Remodeling stairs from carpet to wood is a rewarding DIY project that can significantly enhance the look and feel of your home. By following the steps we’ve outlined, you’ll be able to tackle this project with confidence and achieve professional-looking results without hiring a pro.
However, if you find the process daunting or simply want the peace of mind that comes with professional expertise, consider reaching out to Bonsai Builders.
Why Choose Bonsai Builders?
Master Craftsmanship: Our team of skilled craftsmen brings years of experience and a keen eye for detail to every project. We ensure that each stair remodel is executed to the highest standards of quality.
Exquisite Designs: We understand that every home is unique. Our design specialists work closely with you to create a staircase that not only matches your style but also enhances the overall aesthetic of your home.
Massachusetts Service Area: Based in Sutton, Massachusetts, we proudly serve homeowners across the state. Whether you’re in Boston, Worcester, or any of the surrounding areas, we’re here to help transform your home.
Ready to Transform Your Stairs?
If you’re ready to take the next step in your home renovation journey, contact Bonsai Builders today. Let us bring your vision to life with our expertise in master craftsmanship and exquisite design. Your dream staircase is just a call away!
Frequently Asked Questions about Remodeling Stairs from Carpet to Wood
How much does it cost to change carpet stairs to wood?
The cost to change carpet stairs to wood can vary significantly. On average, you can expect to pay between $100 and $250 per stair. This range depends on several factors:
- Type of Wood: Hardwood species like oak or maple are more expensive than softwoods.
- Staircase Style: Curved or custom stairs cost more than straight stairs.
- DIY vs. Professional: Doing it yourself can save labor costs, which typically range from $50 to $100 per hour.
Can carpeted stairs be changed to wood?
Yes, carpeted stairs can be changed to wood, and it’s a popular home improvement project. Here’s a quick overview of the process:
- Remove Carpet: Pull up the old carpet and padding.
- Prepare the Stairs: Remove staples, tack strips, and any nosing.
- Install New Treads and Risers: Measure, cut, and fit new wood pieces.
- Finishing Touches: Sand, stain, and seal the wood.
Benefits of changing carpet to wood include:
- Aesthetics: Wood stairs look elegant and timeless.
- Durability: Wood lasts longer and is easier to clean than carpet.
- Increased Home Value: Hardwood stairs can boost your home’s resale value.
How do you finish wood stairs after removing carpet?
Finishing wood stairs involves several steps to ensure a polished and durable result:
- Sanding: Start with coarse #60 grit sandpaper and gradually move to finer grits like #120. Use an orbital sanderfor even results.
- Staining: Apply wood stain using a foam brush or cloth. Let it penetrate the wood, then wipe off excess. Repeat if needed for a darker finish.
- Sealing: Use polyurethane to seal the wood. Apply with a paintbrush or foam brush in thin, even layers. Allow it to dry completely between coats.
- Cleaning: After sealing, clean the stairs thoroughly to remove any dust or debris.
By following these steps, you’ll achieve a beautiful and lasting finish on your newly remodeled wood stairs.
If you’re ready to start your project, careful planning and attention to detail will make all the difference.
Our Content
Our experienced contractors and design specialists carefully review and edit all content to ensure it meets our high standards for quality and accuracy. We do this to provide our readers with content that is accurate, complete, reliable, and up-to-date. Bonsai Builders, located in Sutton, Massachusetts is a trusted neighborhood building source across Massachusetts for kitchen remodeling, temporary food preparation space, and more with over 26 years of experience and over 125 jobs completed.
Bonsai Builders has renovated many split-level home kitchens across Massachusetts. Bonsai Builders is selected as best of Houzz year after year further showing their expertise and trust among homeowners in Massachusetts.